Before you add this new Google Analytics to WordPress, it is important to know how beneficial having analytics on your WordPress site is. Analytical data and traffic numbers coming from your site can give you insights into all sorts of numbers that can be used for marketing, interaction, SEO, social media, and more.
Why Add GA4 to WordPress?
As stated above, the importance of Google Analytics and the data it can provide you can’t be overstated. For that reason, when Google releases big updates or versions of Analytics, it is important to upgrade and give your website all of the latest benefits that come with the update.
For example, the Google Analytics 4 update brought with it 4 really great features that everyone can take advantage of. These include:
- Smarter Insights
- Deeper Integration with Google Ads or Adwords
- Customer-Centric Data Measurement
- More Data Controls
These are important tools you can take advantage of and really help get your site marketing to the next level.
Note: The rest of this tutorial assumes you already have Google Analytics set up on your WordPress website.
Add GA4 to WordPress
Step 1: Go to Your Google Analytics Account
Go ahead and start the process by heading over to the Google Analytics homepage and login with your Google account. This gives you access to your dashboard and we can move forward from there.
Step 2: Create a New Google Analytics 4 Property
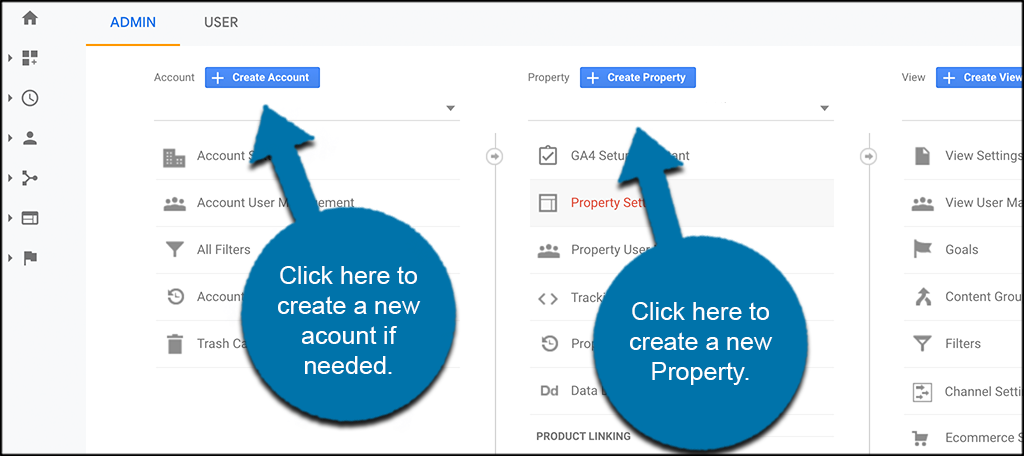
Now that you are inside your Analytics dashboard, you want to create a new GA4 property. You can either click on Admin > Create Account, or select an existing account that you want to set up your new property on.
Since this tutorial assumes you already have a Google Analytics account, we are going to simply click on “Create Property” on an existing account.
Step 3: Add All Property Details
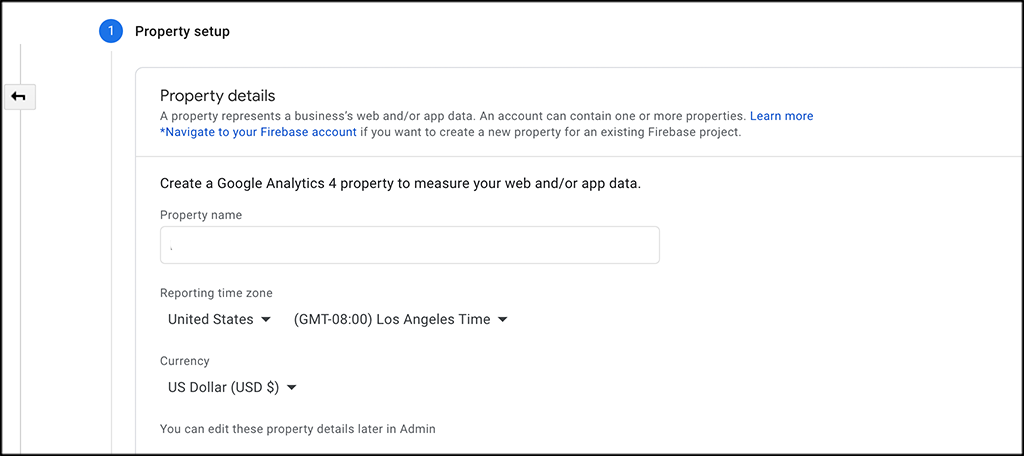
Clicking on the “Create Property” button will take you to the Property Details page. Here, you can add all the relevant property information needed.
Go ahead and name your property, report a time zone, and add any other relevant details that are needed. You set this up how you see fit.
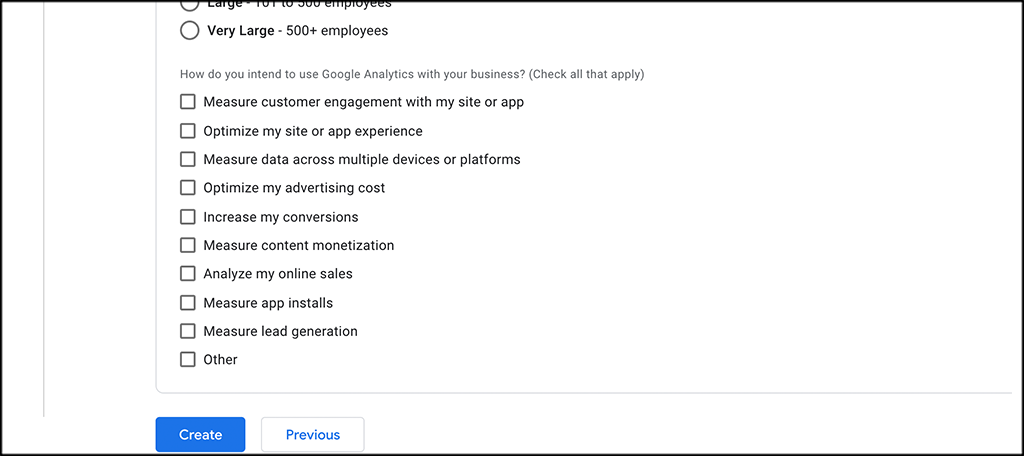
When you are finished, click on the “Next” button to move forward. This takes you down to a few more details you may want to add. This includes business size and a couple of other questions. You can fill this out how you see fit.
When you are done, click on the “Create” button at the bottom of the page.
Step 4: Select “Web” Option
At this point, you will be on the “Data Streams” page. You will see that there are three different options available. iOS App, Android App, and Web. Select “Web.”

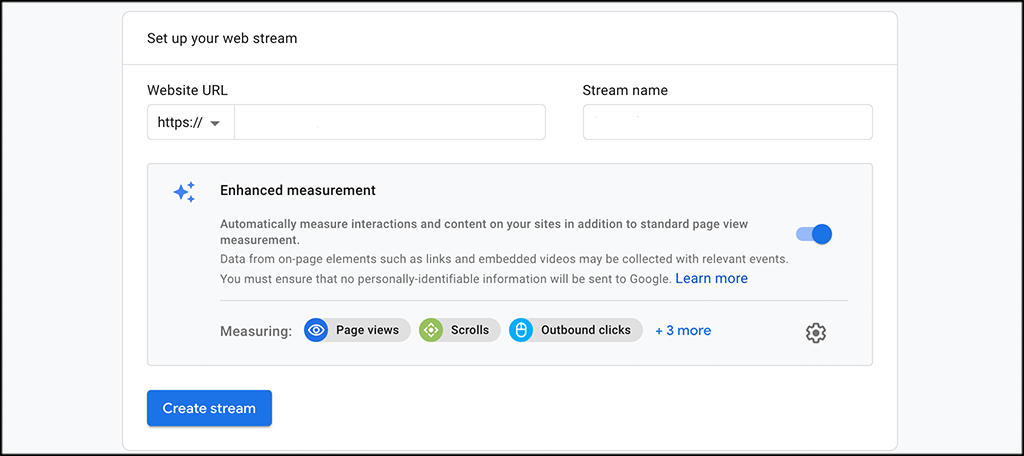
Step 5: Set Up Web Stream
When you click on the Web option, a screen pops out to allow you to set up your web stream. Go ahead and fill out all the relevant information to create the stream. This includes adding your URL, giving your stream a name, and adding or subtracting any enhanced measurements you want.
Click on the “Create Stream” button when you are finished.
Step 6: Connect Your Existing Analytics Property to GA4
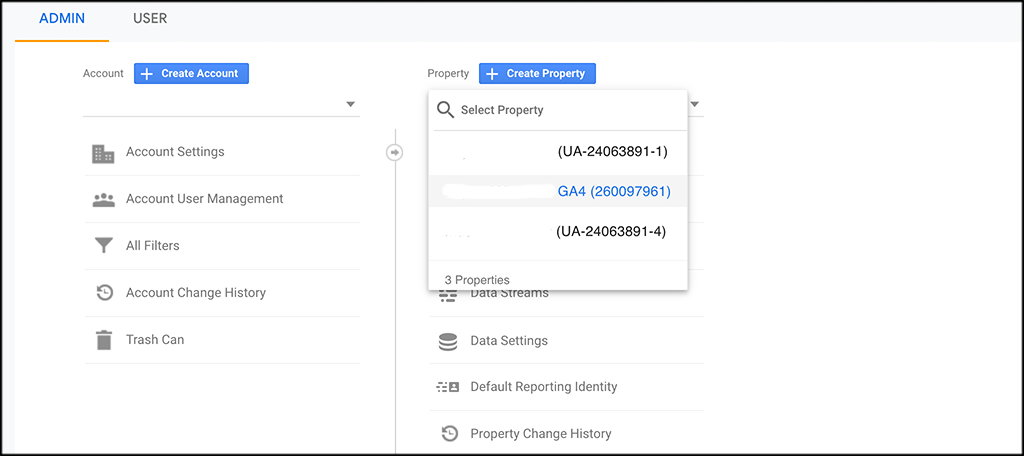
Go back to your existing UA property by clicking on the Admin button and then select your UA Property from the drop-down.
Now, click on the “Tracking Info” option, and in the dropdown menu select “Tracking” code.
On the screen that pops out, copy your tracking code so that you can have it.
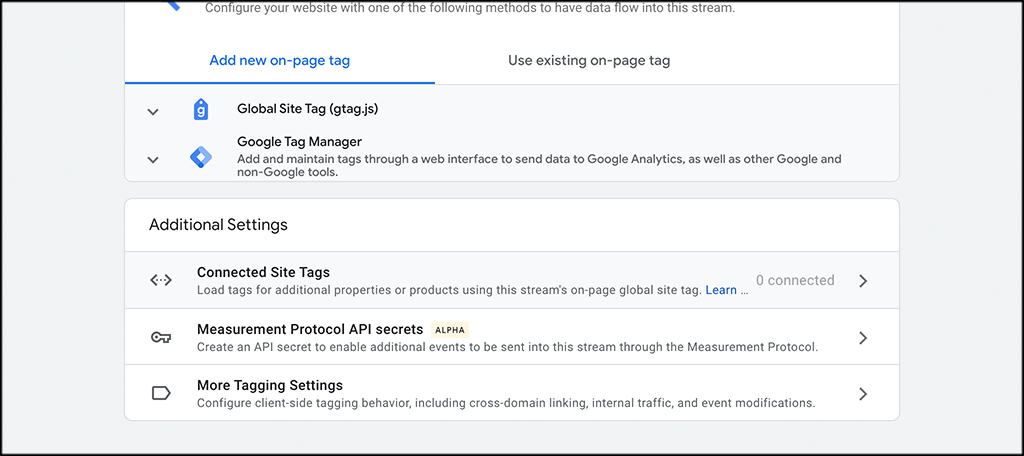
Finally, switch back to your new GA4 Property by selecting the new GA4 Property from the drop-down. Then click on the stream you created above, and look for “Connected Site Tags.” Click on it.
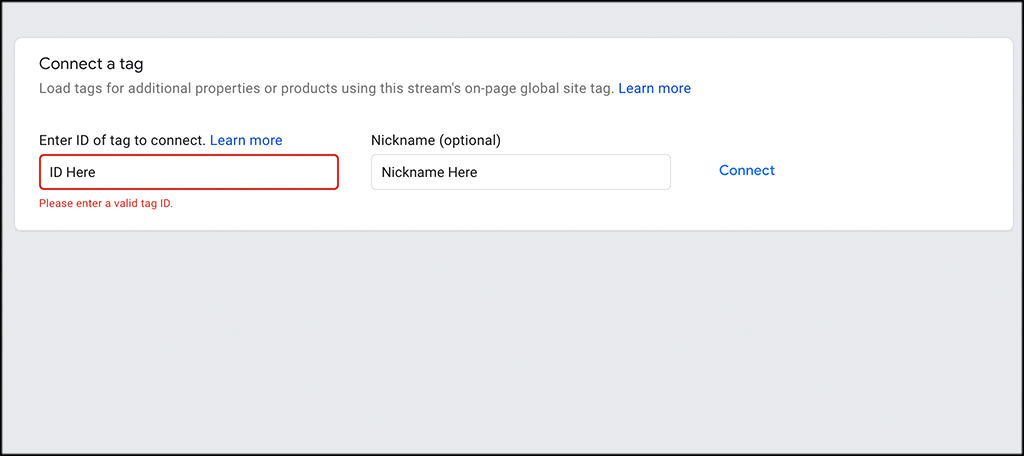
Enter or paste the tracking ID that you copied above, give it a nickname, and then click on “Connect.”
Step 7: Install Tracking Code on Your WordPress Website
You have now made it to the last step of the process. You need to install the tracking code on your WordPress site and then you will start receiving all the data and analytics that come with Google Analytics 4.
From your web stream, click on the “Add new on-page Tag” option and Select Global Tag (gtag.js).
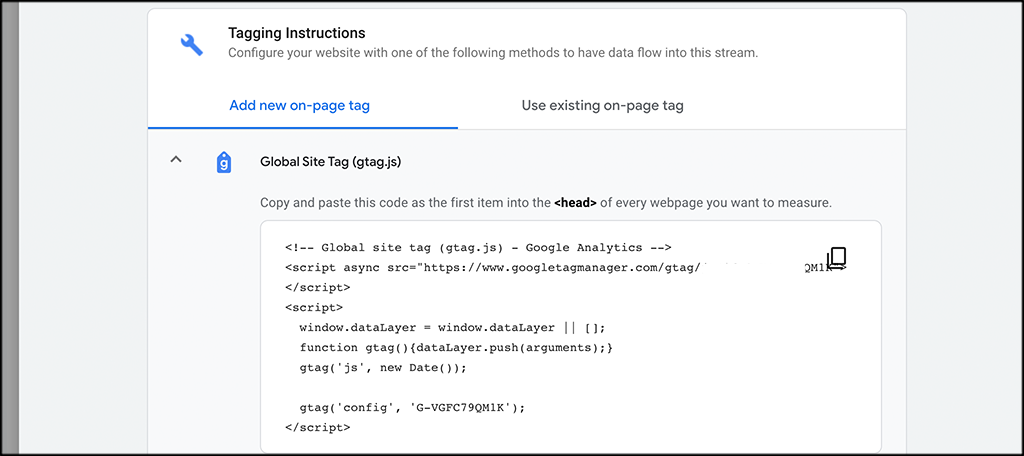
Copy the tracking code. Now let’s head to your site and add the code.
Note: In this case, we are using a WordPress website. You can enter the code into the “head” section of your website. Again, you can go straight into the theme options and add the code, or you can do it by using a plugin that gives you easy access to add code to the head. Either way is fine.
Log in to your WordPress admin dashboard and paste the code into the head of your site as described in the note above. Click on the “Save” button to save your code.
You can do this by using a plugin like Insert Header and Footer. This lets you place code directly into those sections of WordPress. Or you can manually place the code into your site files.
That’s it. You should now be running Google Analytics 4 on your site and you will start to see those numbers come through in your Analytics dashboard shortly.